Chapter 6 - Network Security (Sample)
Copyright and License
Copyright © by Ricardo A. Calix.
All rights reserved. No part of this work may be reproduced or transmitted in any form or by any means, without written permission of the copyright owner.
MIT License.
FTC and Amazon Disclaimer
This post/page/article includes Amazon Affiliate links to products. This site receives income if you purchase through these links.
This income helps support content such as this one.
Network Security
Network security relates to the computer network environment. The unit in this environment is the network packet. Think of packets as little trains with
information that are sent from one computer to another over computer networks and the internet (the rail lines). There are many protocols used to send this
data such as UDP/IP and TCP/IP. In general, data is encapsulated using several protocols as it is prepared to be sent across the network via packets.
Hackers try to understand these protocols to find vulnerabilities that they can exploit. In general, machine learning algorithms can be used to analyze incoming
packets to try to detect which ones could be related to an attack.
Common network attacks include: denial of service attacks, SYN flooding, TCP session hijacking, buffer overflow attacks, and many more.
Firewalls and Intrusion Detection Systems (IDS) are a traditional way to defend against these attacks. The problem is that these approaches depend on already
knowing the characteristics of the attack. There are other types of attacks that are unknown, and these may require more advanced approaches such as machine
learning.
In this chapter I will present an ML based IDS, a privacy preserving auto-encoder, and more.
Intrusion Detection Systems (IDS)
Machine learning for intrusion detection addresses extracting data from network packets for use as features to train classifiers that can identify network attacks.
Examples in the literature of ML for IDS include studies such as: \cite{SankaranCalix2013Ref}, etc. There are some well known datasets in this area such as
the KDD dataset. Good Python libraries for this kind of work include Python's Scapy which can be very helpful to collect the data.
The following is an example of ML for intrusion detection. The data for this example is available here:
-
https://github.com/rcalix1/CyberSecurityAndMachineLearning/tree/main/FirstEdition
First we import the libraries as can be seen below.
Next we set some parameters such as the batch size, learning rate, and device.
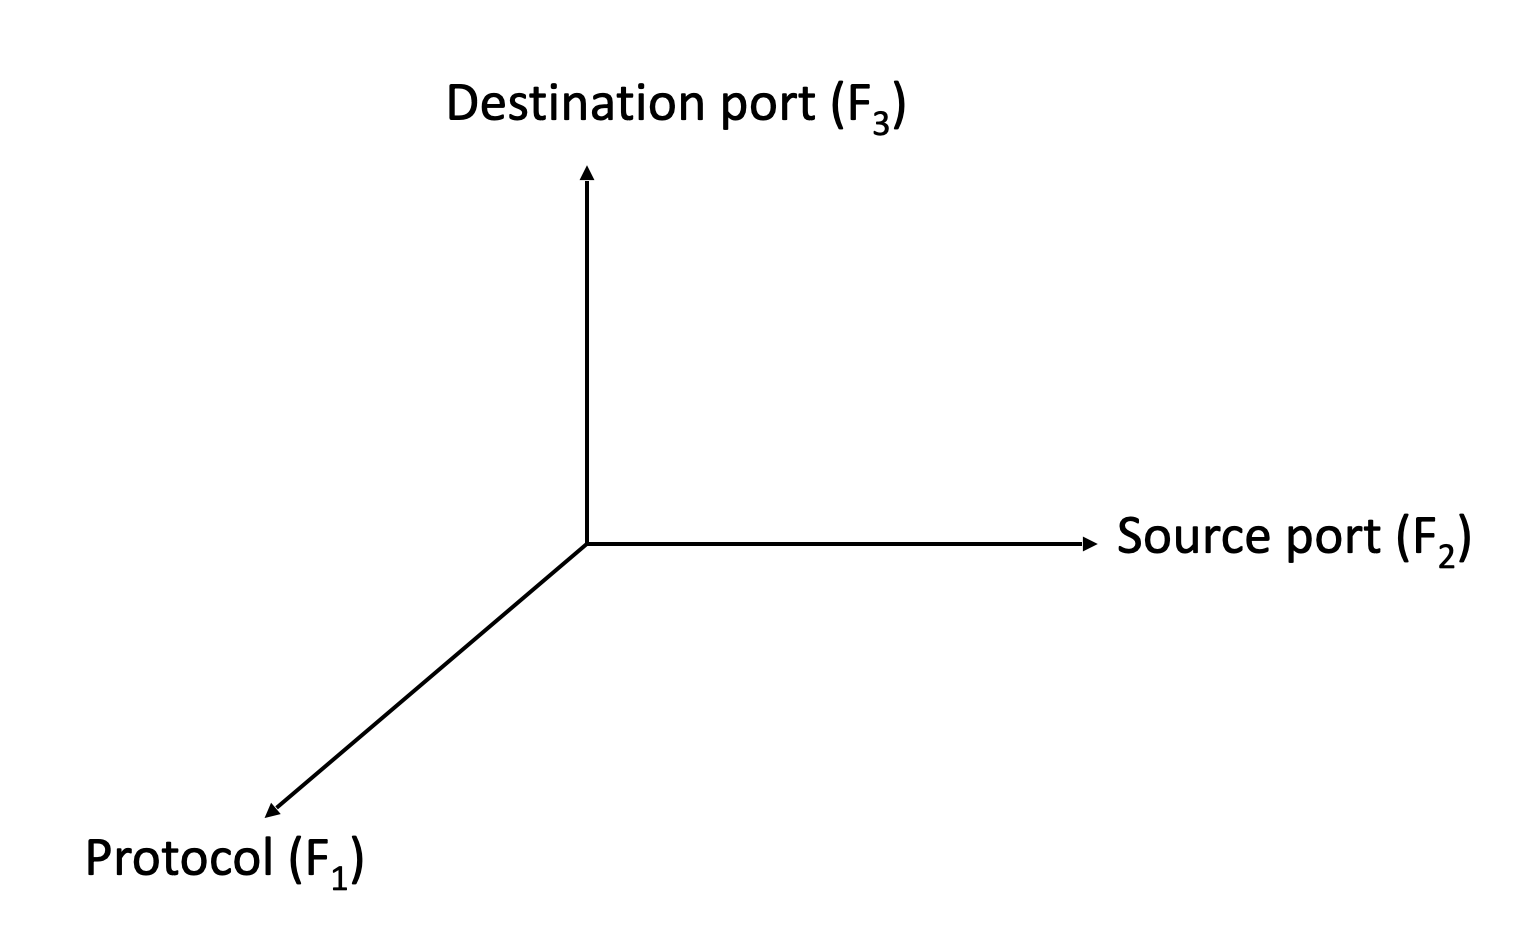
The KDD dataset is a small tabular data set in CSV format with less than 100 features. The provided CSV file already has the data in the format of the vector space
model so we can use it directly with our ML algorithms. Remember that the columns (e.g. source port, destination port, etc.) in the CSV files represent axes in
a vector space model.
Note: Statisticians will complain about this vector space representation for port numbers (previous figure). They would argue that port 22
in the context of computer networks is not more or less than port 80 or 4000. Instead, it would be better to represent port numbers categorically as in port 22 is
either 0 or 1 (its own column), port 80 as 0 or 1 (its own column), and so on.
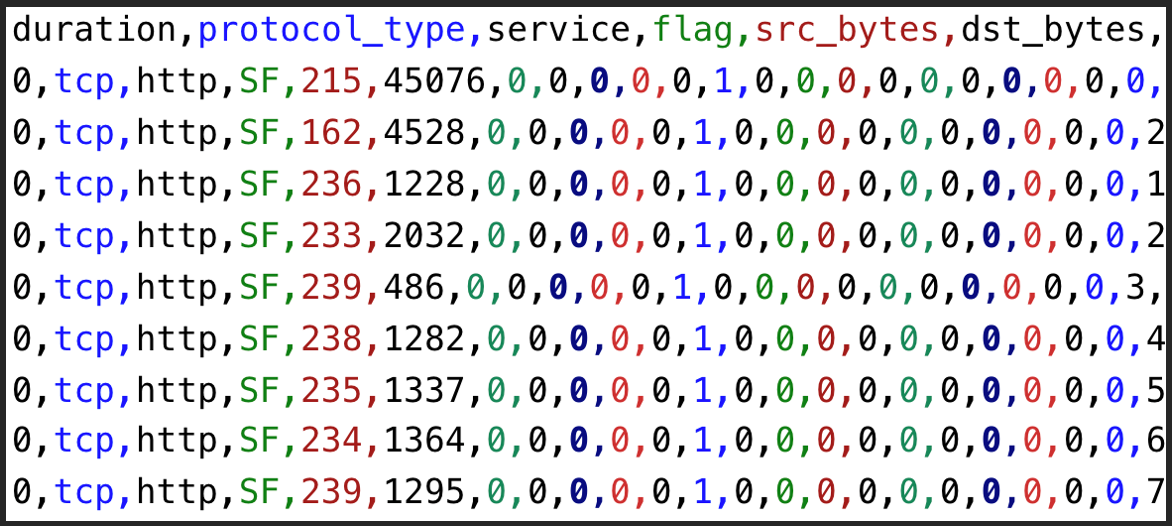
A snippet of the KDD data should look like this:
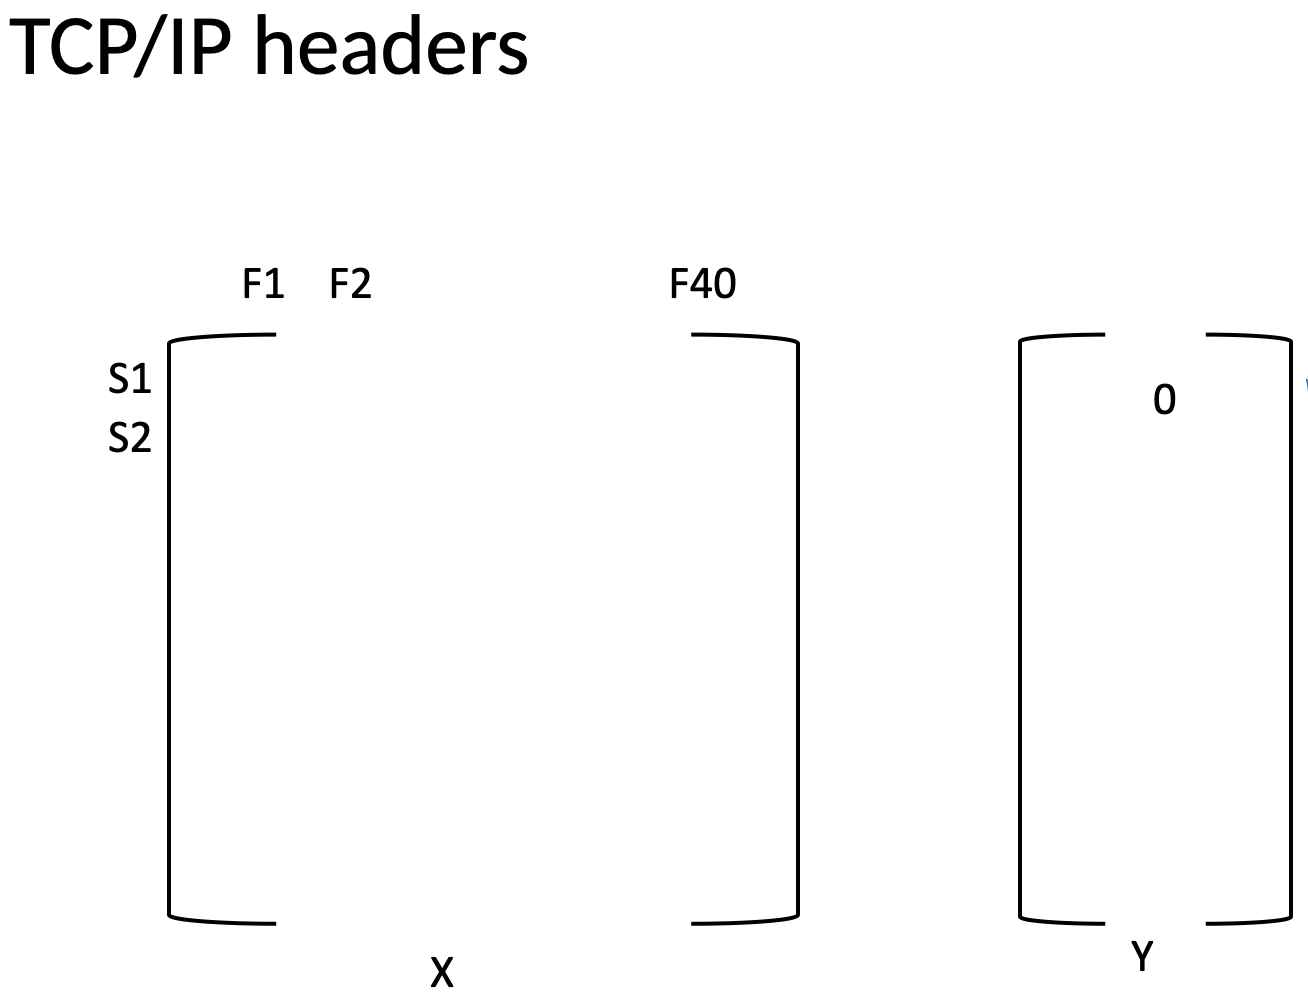
We can read the data using the next code listing. Notice that we use operations such as
train_df[:, :-1]
to slice the data from the CSV into "X" and "y" (Figure below).
We read and slice the data with the following code.
The label encoder is used to convert string based text into numbers.
Next we scale the data, transform the string labels and features, and create the data loaders.
We can now define a neural network architecture for the IDS. Notice that we define a standard deep learning architecture.
Now we define the training loop. The training loop is very similar to our previous implementations from chapter 5.
In the next code listing we can instantiate the model, the optimizer, the scheduler, and the loss function. Notice that we use Cross Entropy for the loss function.
With all that defined, we are now ready to train the IDS model. We can now run the training loop and visualize the loss values.
Finally, we can print out the performance. From the metrics, we can see that the model performs really well.
Anomaly Detection with Packet Payloads
In this section I will show an example of Anomaly Detection with packet payloads in vector spaces. I will show how to encode packet payloads with the
"Bag of Words" approach. We will also use KMeans clustering and Singular Value Decomposition. Obviously, this assumes the payload data is not encrypted.
The following code listings describe the process. First we import the libraries.
Next we proceed to define a "hex" tokenizer. The data in the payloads is assumed to be hex values of length 2. Therefore, we will extract every 2 characters
as a token for use as our vocabulary. This can be done with the following code.
In the next code segment, I will create the data set for this example. It is a random set of hexadecimal values in seven packets. I have intentionally
made the first five samples similar to each other and dissimilar to the last 2 samples. The last 2 are the anomaly packets.
In the next code listing we instantiate the "Bag of Words" Vectorizer from "sklearn". We train it on the data and print the identified 2-character long hex tokens.
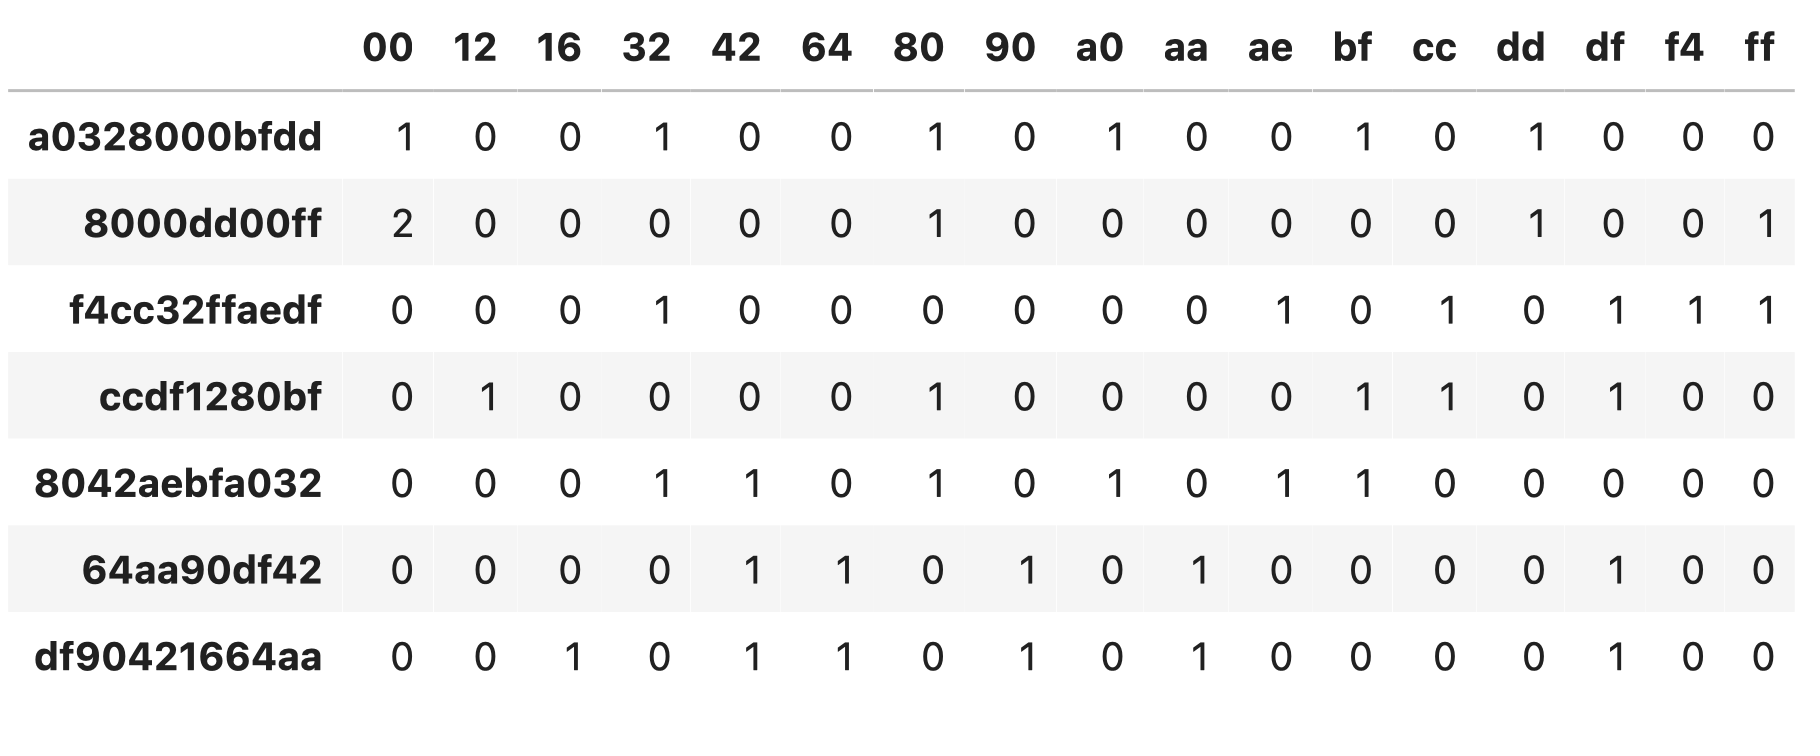
We can use pandas to display the vectorized data using the code in the following code listing.
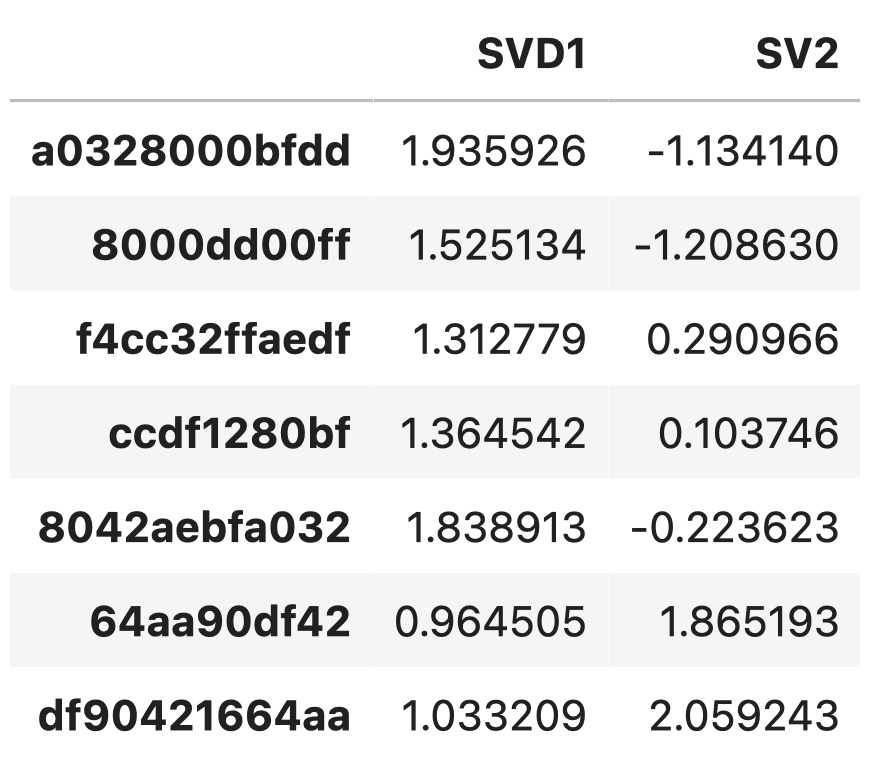
The data now looks as follows:
For visualization purposes, we now proceed to compress the data using Singular Value Decomposition (SVD).
After compression, we reduce the number of columns to just 2 (next figure) in a way that we still retain most of the information from the initial set of feature tokens.
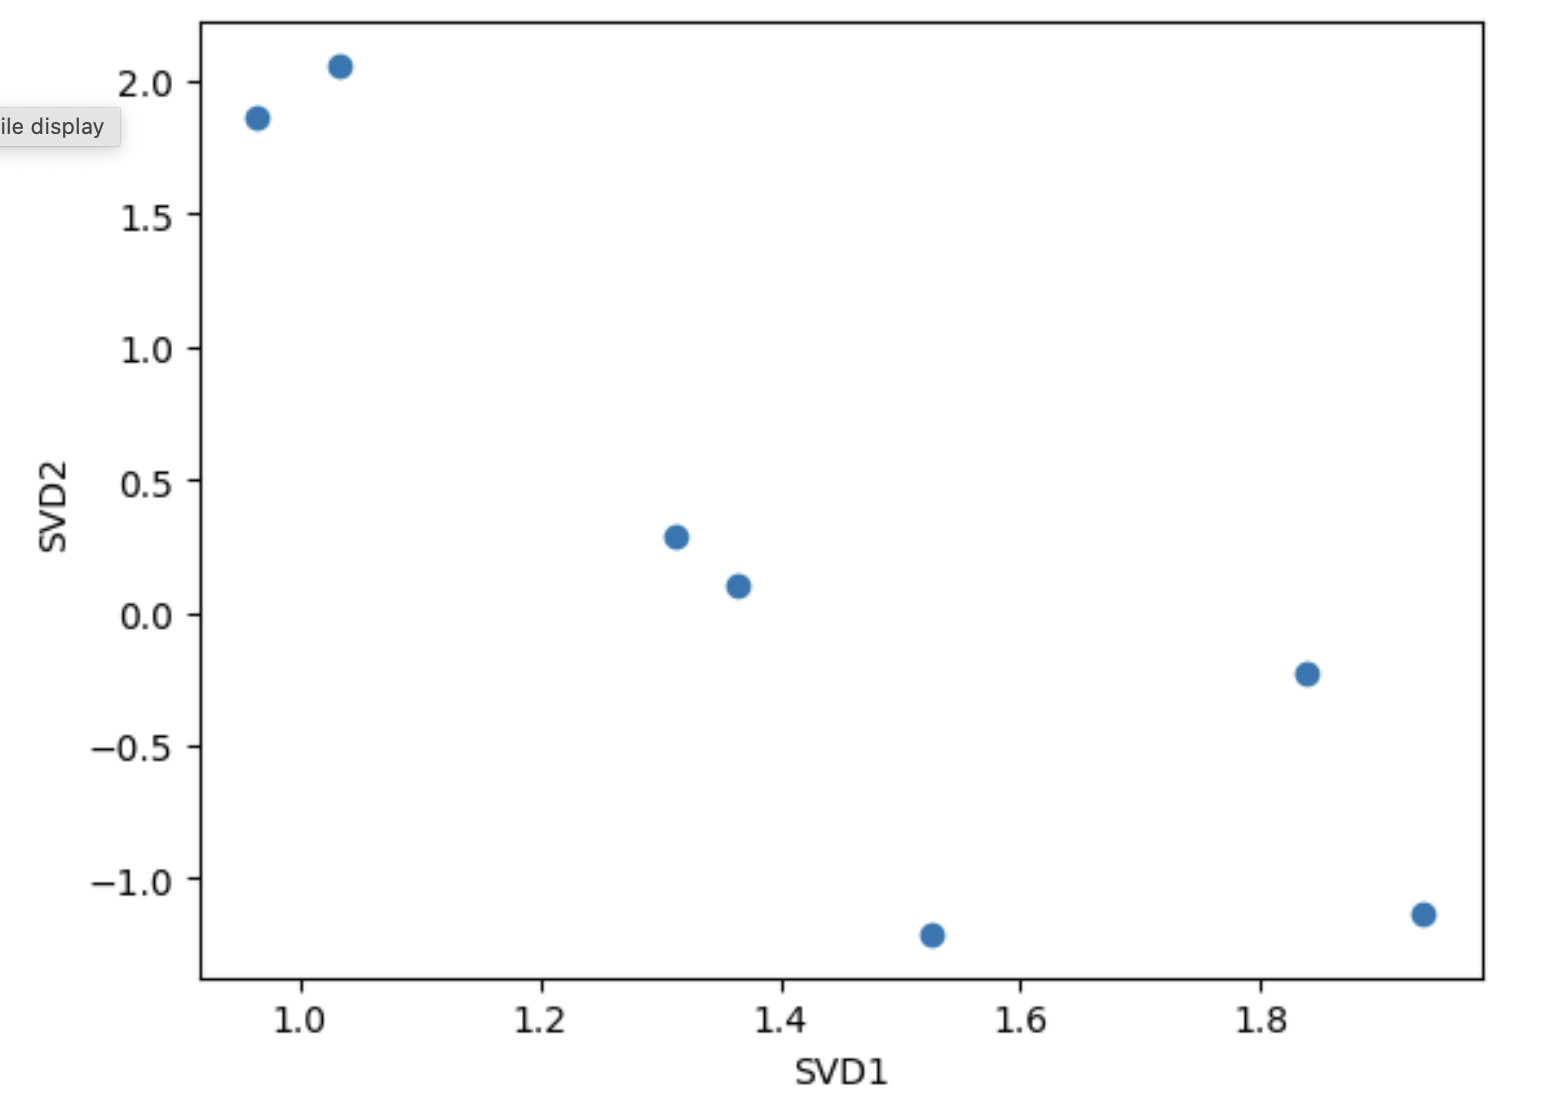
We can now proceed to plot the compressed data as is. The following code listing shows how to plot 2 columns using matplotlib.
The plot can be seen in the following figure.
We are now ready to perform the Anomaly Detection approach using an unsupervised method called KMeans clustering.
The code can be seen in the next code listing.
The results for the seven packets are in "y_lsa". Printing this vector gives us the following:
[0, 0, 0, 0, 0, 1, 1]
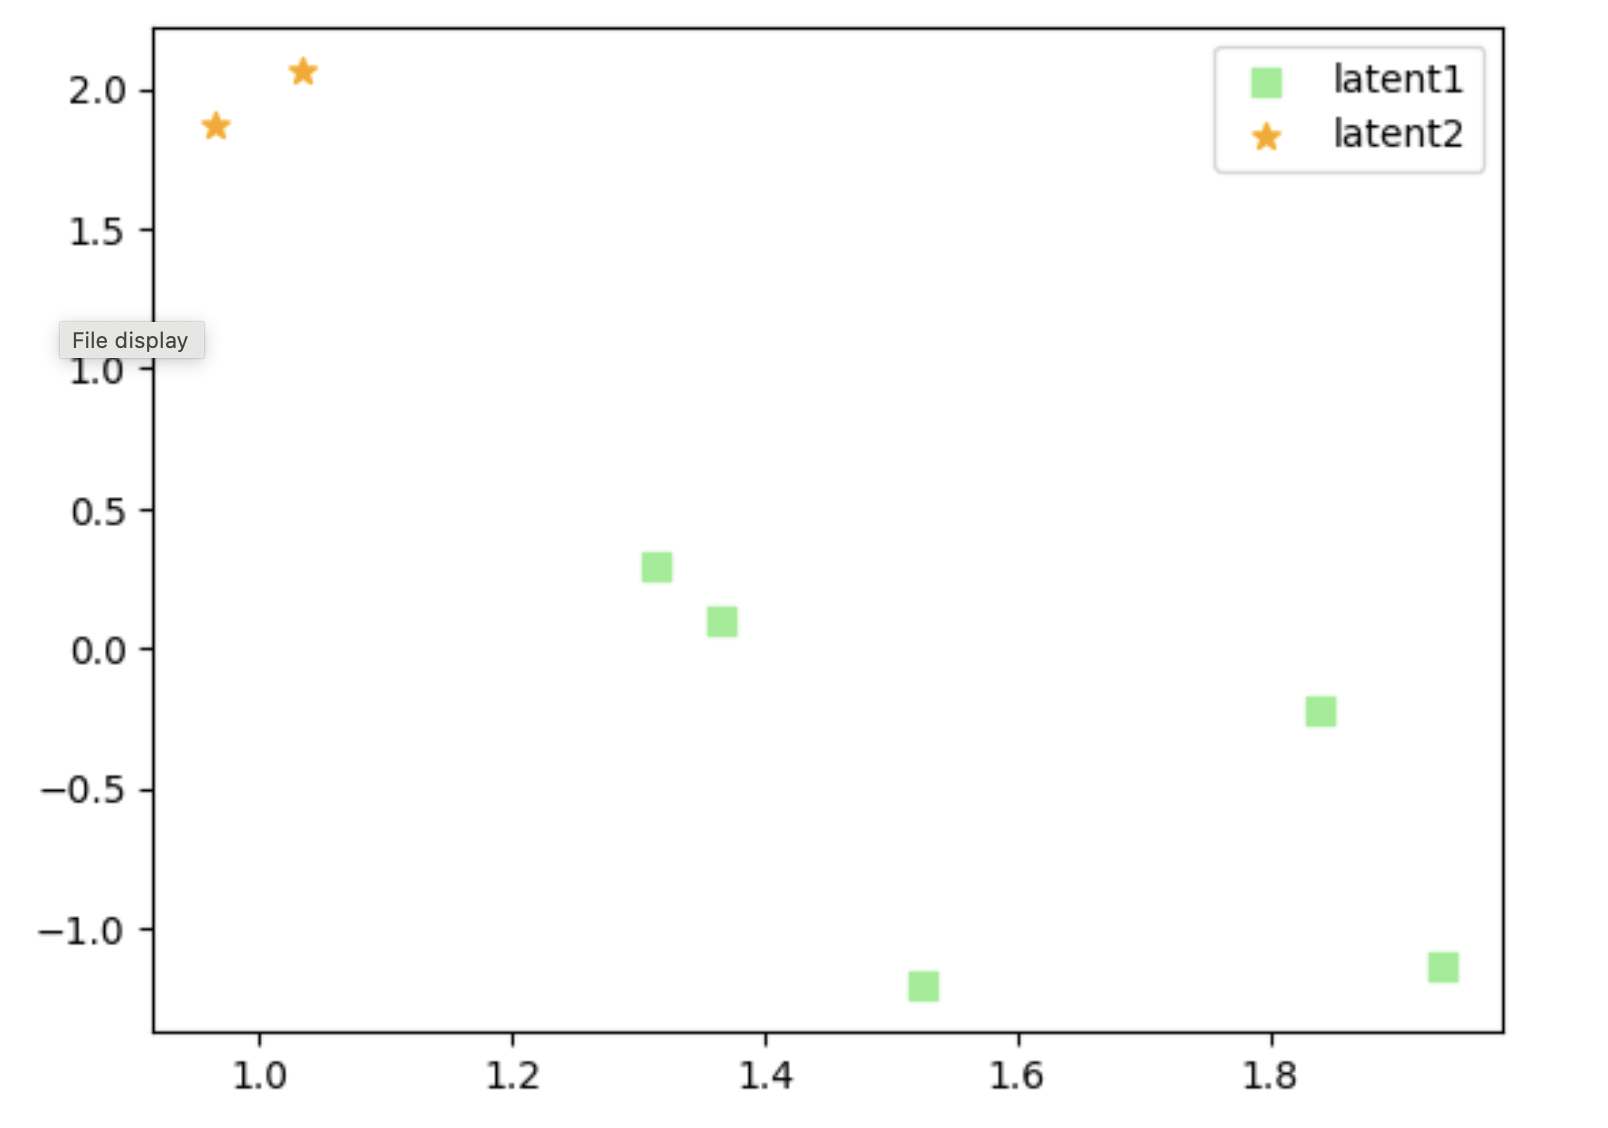
As can be seen, the last 2 anomalous samples have been clustered as 1 and the first 5 as 0. The model worked!
Now we can use the following code to visualize the results of the KMeans algorithm.
The final plot is as follows. Notice the 2 stars representing the 2 anomalies on the upper left hand corner.
Restricted Boltzman Machines
Restricted Boltzman Machines (RBMs) build on the idea of Hopfield networks and can be used to discover properties in data or anomalies. RBMs were first developed
in the 1980's and, as such, have a more basic NN structure than the advanced deep neural networks of today.
The following code segments show an example of how to use RBMs for anomaly detection.
First we define the libraries and the RBM net. As you can see, the RBM has the basic structure of a neural network including hidden layers and weight optimization steps.
Now we can proceed to provide the data and train the model. Notice that the data here is binary so it consists of 0s and 1s. This could be used for ports
numbers, for instance.
For example:
- port 22 .....0
- port 80 .....1
- port 8080...0
- etc.
Once the model is trained, we can use it to reconstruct an input into an output. We can then measure the distance between the input and output,
and we use this distance to determine if the sample is an anomaly.
For this example, the distance between the input test sample and the reconstructed sample is "6".
Privacy Preserving Auto-Encoder
One of the biggest problems in developing ML models for cyber security is getting the data. Many companies and institutions do not like to share their
data given that it may include sensitive private data that should not be shared. In this section I discuss a use case of a technique for cyber defense that
is privacy preserving. The approach involves auto-encoders and it is a type of anomaly detection system. The basic idea is to train multiple auto encoders that
each learn to reconstruct normal network data as embeddings (e.g. for http or telnet traffic). Once these auto-encoders are trained, they can be used to create
embeddings of new network traffic test samples. If the produced embeddings deviate too much from the trained profile distribution, then the auto-encoder based
system can flag the traffic as an anomaly. This approach is general purpose and privacy preserving since it only requires benign samples that are normal to the
site's distribution. This technique can be thought of as an unsupervised type of ML approach.
In this section I will provide a simple example, using random data, of the general privacy preserving auto-encoder approach.
Let us get started!
First we import the libraries.
Next we can generate the random data and create the DataLoader. The random data represents 1000 samples of size 784.
Notice that "x_train" and "y_train" are the same data.
We can now define a simple Auto-Encoder architecture. The encoder layer goes from input to the hidden (latent) layer. And the decoder layer goes from the hidden
(latent) layer to the output layer. Notice input and output have the same size and will be the same data samples during training.
We are now ready to train the auto encoder with the following code.
Once the model is trained, we can run it on, for example, 3 suspicious test samples. We measure the distance between the original and the re-constructed samples.
Produced samples with the highest distance from the original sample are flagged as anomalous (i.e. more different). We use the Euclidean distance for this
distance measurement.
For this example we conclude that sample 2 seems to be the most different with a distance of 29.14.
Summary
This chapter addressed ML for network security.